
It’s the minion takeover at Glitter Girlz Events and Designs. Check out these awesome D.I.Y party ideas that are sure to bring you Minion Party to life.
8. Minion Cake

It’s the minion takeover at Glitter Girlz Events and Designs. Check out these awesome D.I.Y party ideas that are sure to bring you Minion Party to life.
8. Minion Cake

It’s Minion Madness in my house. My twins love them so much and I have to say my older ones secretly love them too.

So when I went to Walmart I seen these super cute minion jello molds and I had to have them.
They are super easy to make and everything came in the pack so for $4.98.
What you will need:
Hot water
Nonstick spray
2 large bowls
2 spoons
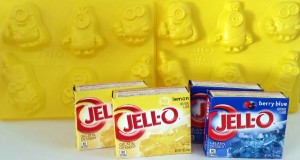
What comes in the box:
2 packs of berry blue
2 packs of lemon
2 minion tray molds
*Simply follow the box directions and allow it to chill for 3 hours.
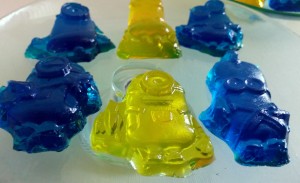

What I love most about these jello molds is that you can use them for parties, or just snacks for the kids.
Anytime you can use something repeatedly makes it a win win in my book.
Until Next time,

Peppa Pig Birthday Party Ideas
**This post contains affiliate links and I will be compensated if you make a purchase after clicking on my links
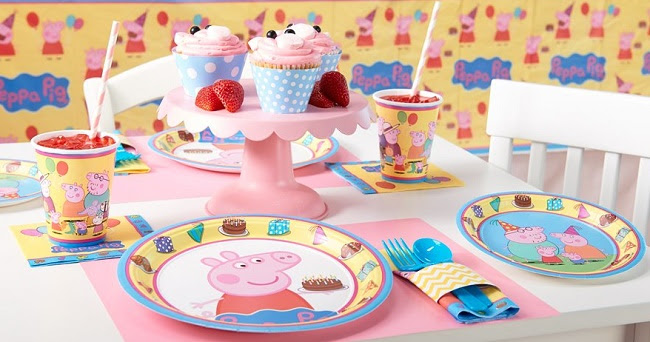
Party with Peppa Pig! Treat your little one to a super celebration with this cute theme from the party experts at BirthdayExpress.com. Peppa Pig loves spending time with Mummy Pig, Daddy Pig, her little brother George, and all her friends! And we bet your little one loves spending time with them, too. So treat your son or daughter to a celebration the whole family will love with a Peppa Pig party!
Peppa Pig Party Supplies – You can get a complete Peppa Pig party at Birthday Express. If you’re not sure where to start, try a Peppa Pig Party in a Box. Simply select the number of little piggies attending your party and click “Get Started.” From there, select the Party in a Box that best suits your needs. Or, if your hosting a party for 8 guests or less, consider the Peppa Pig Value Party Pack. The Value Party Pack makes it easy for hosts with the most to get their child’s birthday celebration started! All of the basics have been bundled together in one convenient pack to make planning a cinch! Perfectly-sized for a party of 8 guests, this pack is big enough for a small gathering, as well as versatile enough so that extra place settings can be added without excess.
Peppa Pig Party Decorations – Sky Blue Matte Balloons, Pink Sparkle Star Foil Balloons, pink, white, and yellow crepe paper, sunflower yellow with white polka dot cone hats … Birthday Express has all the decor to make your Peppa Pig party perfect. For an extra bright party, check out the Pink or the Yellow Paper Decorating Kit! Guests are also sure to love the Peppa Pig Plastic Tablecover and the Red Foil Star Gleam ‘N Burst Centerpiece.
Peppa Pig Party Favors – Give each guest a Peppa Pig Filled Party Favor Box that comes complete with lots of themed sweets and treats! Set one out at each place setting or send home some fun with each guest as they leave – it’s the perfect way to say, “thank you,” for celebrating the birthday kid’s big day! Best of all, they are sturdy, easy to assemble, and priced just right! Or, you could make your own party favors using the Mimosa Striped Paper Treat Bags. You can fill them with crayons, candy, mini pinwheels, activity books, and more!
 Peppa Pig Value Party Pack |
 Peppa Pig Balloon Bouquet |
 Pink Chevron Dot Decorating Kit |

Fourth of July is right around the corner. I wanted to continue with a budget friendly 4th of July and share with you how you can achieve fun and festive centerpieces without breaking the bank. I did two designs. One which requires a silhouette cameo and other which does not. I hope you enjoy!

Items needed for USA CENTERPIECE:
red tissue paper
ONE patriotic boxes (Joann’s had them for $1 with 60% off each)
1 Patriotic Fun Pix for cupcakes
Foam USA sign (Dollar Tree)
Scissors
Hot Glue Gun
Step One

Place your favor box top of your sheet of Styrofoam. Outline the box so that you have accurate shape and cut the square out.
Step Two:
Take your straw and gently poke a hole in the middle of the Styrofoam.
Tip: The straw should be able to hold itself in place when you let go.
Step Three:

Take the straw out and place your Styrofoam square in your favor box.
Step Four:

Take your foam sign and cut majority of your stick off. Be sure to leave about 2 inches from the top like picture below.

Step Five:

Take a straw and put the sign tip into the straw. (It should slide in a little snug.), than tie the ribbon and make a pretty bow.
Step Six:

Take the Patriotic Cupcake Topper and gently slide it into the foam piece at the top.
TIP: Be sure to make sure it’s aligned and in the middle of the sign.

Step Seven:

Take your sheet of tissue paper and cut it in half (save the other half for the other centerpiece).
Place the tissue paper on top of the box so that the box is in the middle. Push the tissue paper inside the box.
Tip: Tissue paper should be on top of the Styrofoam
Step Eight:
Take your sign and poke it through the tissue paper where the hole you had already made is. Tuck the tissue paper in and it will look like the centerpiece below on the left.

Items needed for PATRIOTIC STARS CENTERPIECE
Silhouette Cameo
White and blue card stock
red tissue paper
red ribbon
ONE patriotic boxes (Joann’s had them for $1 with 60% off)
Scissors
Hot Glue Gun
Step One:
Begin by cutting out the stars you would like to use for the centerpiece.
I used the 3d star garland from Sweet Afton. I made two whites and one blue.
Step Two:
Once you assemble them allow them to dry while you follow steps one through three from above.
Step Three:
Take the other half of the tissue paper and place the tissue paper on top of the box so that the box is in the middle. Push the tissue paper inside the box.
Tip: Tissue paper should be on top of the Styrofoam
Step Four:

Poke the straw through the tissue paper into the previously made hole in the middle of the Styrofoam. Than add two more straws, one on the left and one on the right. Gently poking them through just like you did the one in the middle.
Step Five:

Take your star and find an opening at the bottom.
Tip: If you can’t see an opening, you can gently squeeze it together to find the opening.
Step Four:
![]()
Apply a small amount of hot glue to the inside of the star on the back piece of paper (where the red dot is located).
Place one straw (from the box that you made holes with earlier) on the glue than add another dot of glue on top of straw and close the star so that it adheres to the straw.
Repeat this step with the other two stars and straws
Step Five:
Tie red ribbon around each straw and place back in box. Fold tissue paper in the box and you have another easy peasy centerpiece.
Total Cost for both centerpieces: $10
Hope you enjoyed the tutorial. If you have any awesome ideas, add them below and don’t forget to comment, share and pin.
Until Next time,

Fourth Of July is quickly approaching and with all the family vacations and summer time fun that’s taking place, I know you all want to enjoy a good cook out, or get together with friends and family without breaking the bank. Well have no fear, we have put together party items that are budget friendly and easy to style.
From burgers, hotdogs, potato salad and more you are sure to have a favorite of food, but don’t forget about those who have a sweet tooth. You can set up a small display like this one with yummy treats like the cake in a jars and rice krispy treats done by Peace Moore of Lovely Chic Occasions. If you don’t have time to order but want to make your own check out these recipes for cakes in a jar. You can also opt for store bought items like the mini cupcakes or a cake. I purchased mine from my local walmart. I added Wilton Fun Pixs from Joann’s to give the cupcake a patriotic flare without breaking the bank.

Another easy and inexpensive way to jazz up your patriotic party is to add matching plates, utensils and cups. I took a visit to my local dollar tree for some inexpensive items and I found those patriotic plates with red and white stripes as well as blue stars (see photo at below). The blue stars would work great as children plates or even dessert plates. For the utensils I grabbed red to contrast with the white napkins and to stay true to the party theme.
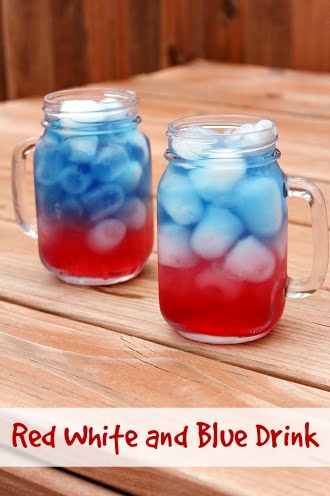

For the cups, I opted for a clear cup for two reasons, first because you can put fun drink combinations like this one from SlapDashMom (on your left). Just add the patriotic star straws (to your right) I got from Joanns and you are all set.
To tie all the pieces together you can try a number of different decor pieces. Again to keep the cost very low, I opted for patriotic lanterns and fans from the dollar tree.

It will add a little more color and patrioticiness (I made that up lol) to your party.
For your final touches add super cute centerpieces to your table and a matching tablecloth. Red, blue or white is fine of course or you can even opt for one with stripes like this one from FantasyVintageBridal on Etsy or this one Navy and white star tablecloth from Dreamzzzzz. Keep in mind that this is not a budget friendly item but it sure would be pretty on a table :).
 *photo from pinterest

*photo from pinterest
Last but not least, One of my favorite items is the patriotic flag wreath (see third picture above). While this is not a budget friendly item I love it very much and I use it on my front door to help us celebrate this holiday. You can find this wreath at First Impressions by Christi .
All in all I hope you were inspired you to decorate your home without breaking the bank for the holidays. Stay tuned for tomorrow’s blog post. I will share D.I.Y budget friendly centerpieces. Don’t forget to comment, share and pin. 🙂
Until next time,
There’s no secret that kids love Mickey Mouse. He was here when I was little and he’s still here with his friends for my children. So when a good friend of mine asked me to design her a mickey mouse centerpiece for her little prince I was super excited to do so. The ultimate goal was to keep it budget friendly so I opted for minimum items. Let’s get started….
ITEMS NEEDED:
 Black Acrylic Paint
Three Styrofoam balls (2 at 2.5 inches and 1 at 3 inches)
Wooden Dowel
2 small Popsicle sticks (You can use one and cut it in half if you like)
Small rectangle of Styrofoam (to serve as base)
Gable Box or terracotta pot
STEP ONE

Take your gable box and fold the flaps down on all four sides
STEP TWO

Place the Styrofoam in the box. This will keep the flaps down and serve as the base for the centerpiece
TIP: You can also add a piece of card stock to cover the white.
STEP THREE

Take the small 2.5 inch Styrofoam ball and stick a small Popsicle (or halve of Popsicle) inside.
TIP: Once you place the stick in the ball, take it out and use hot glue to fill the hole. Place the stick back in the hole to adhere it to the ball.
REPEAT THIS STEP AGAIN WITH THE OTHER 2.5 STYROFOAM BALL
STEP FOUR

Take the small Styrofoam balls with stick and stick it in the bigger 3 inch Styrofoam ball. Make sure it is placed were you want it and than repeat step 3 TIP.
STEP FIVE

Added the second ball so that the mickey mouse ear and you have the head.
STEP SIX

Paint the Mickey Mouse Head. Allow 24 hours to dry.
Once it has dried, you can do whatever it is you would like to do.
Here is some examples of what I did with mine.


Hope you enjoyed the tutorial.
If you have any questions or have ideas to share feel free to leave a comment.
Like, share and pin 🙂
Until next time,
 Father’s Day is right around the corner. So what do you get that awesome father who has everything? Here’s an super easy gift basket for dad that is sure to be appreciated.
Shopping list:
Crafting supplies
So let’s get started……………
First thing first, I let my lovely kids drink the crush soda (I payed for it later). lol Once they were finished I washed the bottles out with soap and hot water and allowed them to air dry while I worked on the holder.

To ensure that my design was the right size, I measured the box.
Once I determined what dimensions would fit, I used PicMonkey to create the design that I wanted for the front of the box.
 After printing out my design on white card stock, I matched a similar blue card-stock to it. This card-stock will be the cover for the sides and back of the box.
I used my ruler and a pencil to measure the sides and the back. I ended up with 4 small squares and one long rectangle for the back.
*Notice below that the paper goes up towards the handle. This is to cover the triangle that leads to the handle. If you don’t cover it the orange will show.

Next, Just simply fold the paper over the ends to make the perfect angle. Than fold the edges back towards you to make the crease more apparent. Now you can glue it, down without it bulking up.
Once the sides and backs are glued on than you can measure the top and cut the card-stock accordingly.
*Notice I measure more towards the inside the box (in the front) to be sure I got ride off all orange.
Glue the pieces down and allow to dry.
TIP: I did not bother making a hole for a handle, because my contents were to heavy.

Next step is to create tags for the bottles that will hold the candy inside. Using my silhouette I designed small tags that would go around the necks of the bottles. I also printed out small tags with a cute message on white card stock and adhered them to the top of the tags. Don’t forget to punch a hole in either the left or right hand corner depending on what side you want the tag to hang. 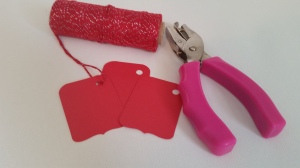

Once the tags are finished. I grabbed my bottles and my bags of treats and began to fill them up.

I was pretty sure that two bags of skittles would have filled the bottle, however I was totally wrong. You will most definitely need 3 bags of skittles and 2 bags of pistachios.

*I started with intentions of making three bottles, but opted for 2 instead because I had more snacks rather than candy*.


Once the treats are in the jar, cover them lids.
Take your tissue paper and cut a 3 x 3 square out. Place the tissue paper over the bottle so that the top is in the middle of it and fold over it. Than tie the tag around the neck with baker’s twine or ribbon.

As for the other treats, you can place them however you like.
TIP: I added tissue paper at the bottom of the snacks to help them get a little more height and not sink into the box.
DISCLAIMER: In all honesty my hubby loves CANDY more than anything but I decided to NOT feed that habit and instead tend to his “snacking” habit lol. You can of course do whatever it is you think your husband will like.

Hope you enjoyed DAD’S Emergency Stash.
Have any questions, comments or just want to share some father’s day gifts you have done. Leave it in the comments, below.
Until Next Time,
Avengers Age of Ultron Birthday Party Ideas
**This post contains affiliate links and I will be compensated if you make a purchase after clicking on my links

Pull together a fun-filled, adventurous birthday party with the best team around – the Avengers! With the Avengers Age of Ultron movie in theaters starting May 1st, you’re little superhero will be super excited to celebrate with their favorite character!
Avengers Party Supplies – The first superhero strategy for throwing a party your child will “Marvel” at is to make sure you have all the important birthday supplies on hand. The Avengers Assemble Value Party Pack from BirthdayExpress has got you covered. It includes everything you need, including cups, plates, birthday invitations and more. Your child will be thrilled to see all of the Avengers — including Hulk, Iron Man, Thor, Black Widow, Captain America and Hawkeye — on these awesome supplies at their celebration.
Avengers Decorations – What better way to unite the whole team than by giving each guest their own Avengers Masks? Add some red, white, and blue balloons, ceiling streamers, and the Avangers Assemble Wall Decorating Kitand your superheros will feel right at home.
Avengers Games & Favors – What’s a party without games?! Pick up the Avengers Assemble Party Game. Instead of pin-the-tail-on-the-donkey, it’s stick the Arc Reactor to Iron Man’s chest! Whoever gets closest could win a The Avengers PEZ Dispenser And don’t forget the party favors! Birthday Express has everything a budding superhero would need, including Avengers Assemble Tattoos, paper masks, erasers, and bracelets!
Top the party off by dressing the guest of honor as their favorite Avengers hero. Birthday Express has a full assortment of Avengers costumes for toddlers, kids, and even adults!
 Avengers Assemble Value Party Pack |
 The Avengers PEZ Dispenser |
 Avengers Assemble Party Game |
Until next time,

Father’s Day is around the corner and every year, I’m stuck trying to figure out what to get the awesome father of my children. So I hit Pinterest for some D.I.Y inspiration for both the kids and I. There are so many different gifts out. Some that can be super cheesy and I often feel it’s hard to narrow it down. So I picked a few that I thought were cool and NOT so cheesy. I mixed the list up for those who aren’t as D.I.Y adventurous.
For the Dad that’s a couch potato:
For the Dad who is a socialite:
For the Dad that’s a Foody:
For the Dad who loves Bacon:
For the Dad that who always loses things:
For the Dad whose a grill master:
6. Dad is king of the grill platter
For the Dad who is AWESOME:
For the Dad whose a kid at heart:
For the Dad who WANTS to be a grill master (but doesn’t quite have it)
For the Dad that’s a handy man:
For the Dad with a Sweet tooth
11. S’mores Gift Box
I hope you liked the round up. If you have a father’s gift idea you would like share, just comment and leave the link below. Glitter Girlz Events and Designs and our readers would love to check it out.
Until next time,
How to Throw an Army-Themed Birthday Party
**This post contains affiliate links and I will be compensated if you make a purchase after clicking on my links
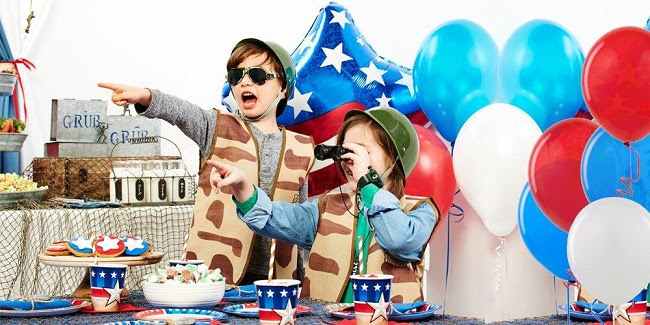
Atttennnn-tion! Does your little soldier have a birthday coming up? Then your mission is to report for duty to BirthdayExpress! They have all the supplies and gear you’ll need to throw your little Ranger the perfect party!
Camo Army Party Supplies – Invitations? Check. Plates, cups, napkins, and utensils? Check. Birthday candles and balloons? Check and check. Birthday Express‘ Camo Army Soldier Value Party Pack includes all the party essentials you’ll need to complete your party-planning mission – and at a cost that is sure to earn you a rank increase.
Camo Army Decorations – In addition to the red and blue balloons, ribbons, and red crepe paper that is included in the Camo Army Value Party Pack, the Birthday Express‘ Camo Army Solider personalized banner will create an official party headquarters. You could also go with a camo-themed decor and turn the party zone into a top-secret special ops base for the little solider and their platoon.
Camo Army Games & Favors – No Army-themed party would be complete without Birthday Express‘ Camouflage Tank Party Game. Each solider is blindfolded and is tasked with getting the tank sticker onto the target. Talk about a tough assignment! Fortunately in this game, everyone is a winner. To show their appreciation for their troop’s dedication, the birthday kid can ensure that each party attendee is field-ready with the Camo Army Solider Filled Favor Box. Supplies include, binoculars, a compass, a dog tag, aviator sunglasses, and Army soldier stickers.
And what soldier would be ready for birthday duty without their very own camo vest and camo helmet? BirthdayExpress has all these items and more! Copy that. Over and out.
 Camo Army Soldier Value Party Pack |
 Camouflage Tank Party Game |
 Camo Army Solider Filled Favor Box |
Until Next time,
Creating inspired events for every occasion.
Confident. Passionate. Ambitious. Queen.
Parties and Potty Training.
Party and Event Planning, D.I.Y Activities, Awesome Pinterest Finds and doing all while raising a large family
mogul branding agency
Just another WordPress.com site
The greatest WordPress.com site in all the land!
To help people find balance in their lives; promote inner love and self worth!
the musings of a product junkie...
