Fourth of July is right around the corner. I wanted to continue with a budget friendly 4th of July and share with you how you can achieve fun and festive centerpieces without breaking the bank. I did two designs. One which requires a silhouette cameo and other which does not. I hope you enjoy!
Items needed for USA CENTERPIECE:
red tissue paper
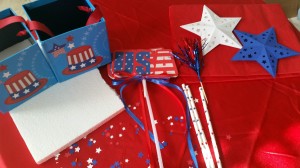
ONE patriotic boxes (Joann’s had them for $1 with 60% off each)
1 patriotic star straws
Styrofoam
1 Patriotic Fun Pix for cupcakes
Foam USA sign (Dollar Tree)
Scissors
Hot Glue Gun
Step One

Place your favor box top of your sheet of Styrofoam. Outline the box so that you have accurate shape and cut the square out.
Step Two:

Take your straw and gently poke a hole in the middle of the Styrofoam.
Tip: The straw should be able to hold itself in place when you let go.
Step Three:

Take the straw out and place your Styrofoam square in your favor box.
Step Four:

Take your foam sign and cut majority of your stick off. Be sure to leave about 2 inches from the top like picture below.

Step Five:

Take a straw and put the sign tip into the straw. (It should slide in a little snug.), than tie the ribbon and make a pretty bow.
Step Six:
Take the Patriotic Cupcake Topper and gently slide it into the foam piece at the top.
TIP: Be sure to make sure it’s aligned and in the middle of the sign.

Step Seven:

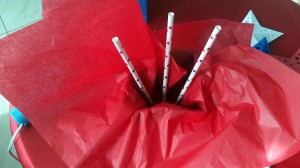
Take your sheet of tissue paper and cut it in half (save the other half for the other centerpiece).
Place the tissue paper on top of the box so that the box is in the middle. Push the tissue paper inside the box.
Tip: Tissue paper should be on top of the Styrofoam
Step Eight:
Take your sign and poke it through the tissue paper where the hole you had already made is. Tuck the tissue paper in and it will look like the centerpiece below on the left.

Items needed for PATRIOTIC STARS CENTERPIECE
Silhouette Cameo
White and blue card stock
red tissue paper
red ribbon
ONE patriotic boxes (Joann’s had them for $1 with 60% off)
3 patriotic star straws
Styrofoam
Scissors
Hot Glue Gun
Step One:
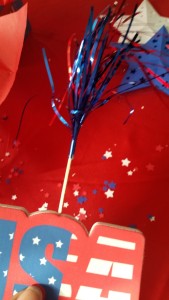
Begin by cutting out the stars you would like to use for the centerpiece.
I used the 3d star garland from Sweet Afton. I made two whites and one blue.
Step Two:
Once you assemble them allow them to dry while you follow steps one through three from above.
Step Three:
Take the other half of the tissue paper and place the tissue paper on top of the box so that the box is in the middle. Push the tissue paper inside the box.
Tip: Tissue paper should be on top of the Styrofoam
Step Four:
Poke the straw through the tissue paper into the previously made hole in the middle of the Styrofoam. Than add two more straws, one on the left and one on the right. Gently poking them through just like you did the one in the middle.
Step Five:

Take your star and find an opening at the bottom.
Tip: If you can’t see an opening, you can gently squeeze it together to find the opening.
Step Four:

Apply a small amount of hot glue to the inside of the star on the back piece of paper (where the red dot is located).
Place one straw (from the box that you made holes with earlier) on the glue than add another dot of glue on top of straw and close the star so that it adheres to the straw.
Repeat this step with the other two stars and straws
Step Five:
Tie red ribbon around each straw and place back in box. Fold tissue paper in the box and you have another easy peasy centerpiece.
Total Cost for both centerpieces: $10
Hope you enjoyed the tutorial. If you have any awesome ideas, add them below and don’t forget to comment, share and pin.
Until Next time,